Probably doesn’t need any explanation, but for those who haven’t seen it before, Icom transceivers with the four pin antenna tuner connection on the back are able to transmit a low power carrier for tuning.
There are various versions available, including some which have a capacitor so that when the tune button on the front panel is pushed, the radio will transmit a carrier for a few seconds (depending on the capacitor and resistor value). This doesn’t work for me, either the time is too short, or if there is a fault (like I forgot to switch the antenna through ) I want to stop transmitting immediately.
All the commercial ones are “expensive” as you are paying for the time taken to put them together 🙂
Couple of reasons why I chose to make mine the way I did.
I did not want a big button, as I slide it under the front of the rig when not in use.
I wanted the wire to come out of the end of the device in the direction it is going towards the rig, not backwards towards me!
I wanted to use single core screened cable, which means the resistor is mounted on the back of the plug at the rig end. Seems illogical to use multicore cable just to go to a resistor and back.
I wanted to use a tactile switch, I like the definite feel that it is depressed.
I wanted it cheap and to use commonly available materials as far as possible.
Some versions have a switch inline with the resistor so that it can be switched out, and the radio will revert to the internal tuner on the next power up. I don’t see the point in this, as if the radio has an internal tuner, or there is an Icom compatible external tuner attached, I would push the button on the radio or tuner, not a separate button! Also, one of the common uses for the external button is when a linear is used, then you certainly don’t want the internal tuner to be activated.
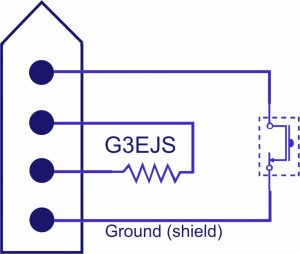
The circuit is very simple. The switch is normally open (couldn’t find one on CorelDraw )
The resistor is 8k2 (10k will work too). All the resistor does is tells the radio there is a tuner attached. For this reason, it must be plugged in before the radio is turned on.
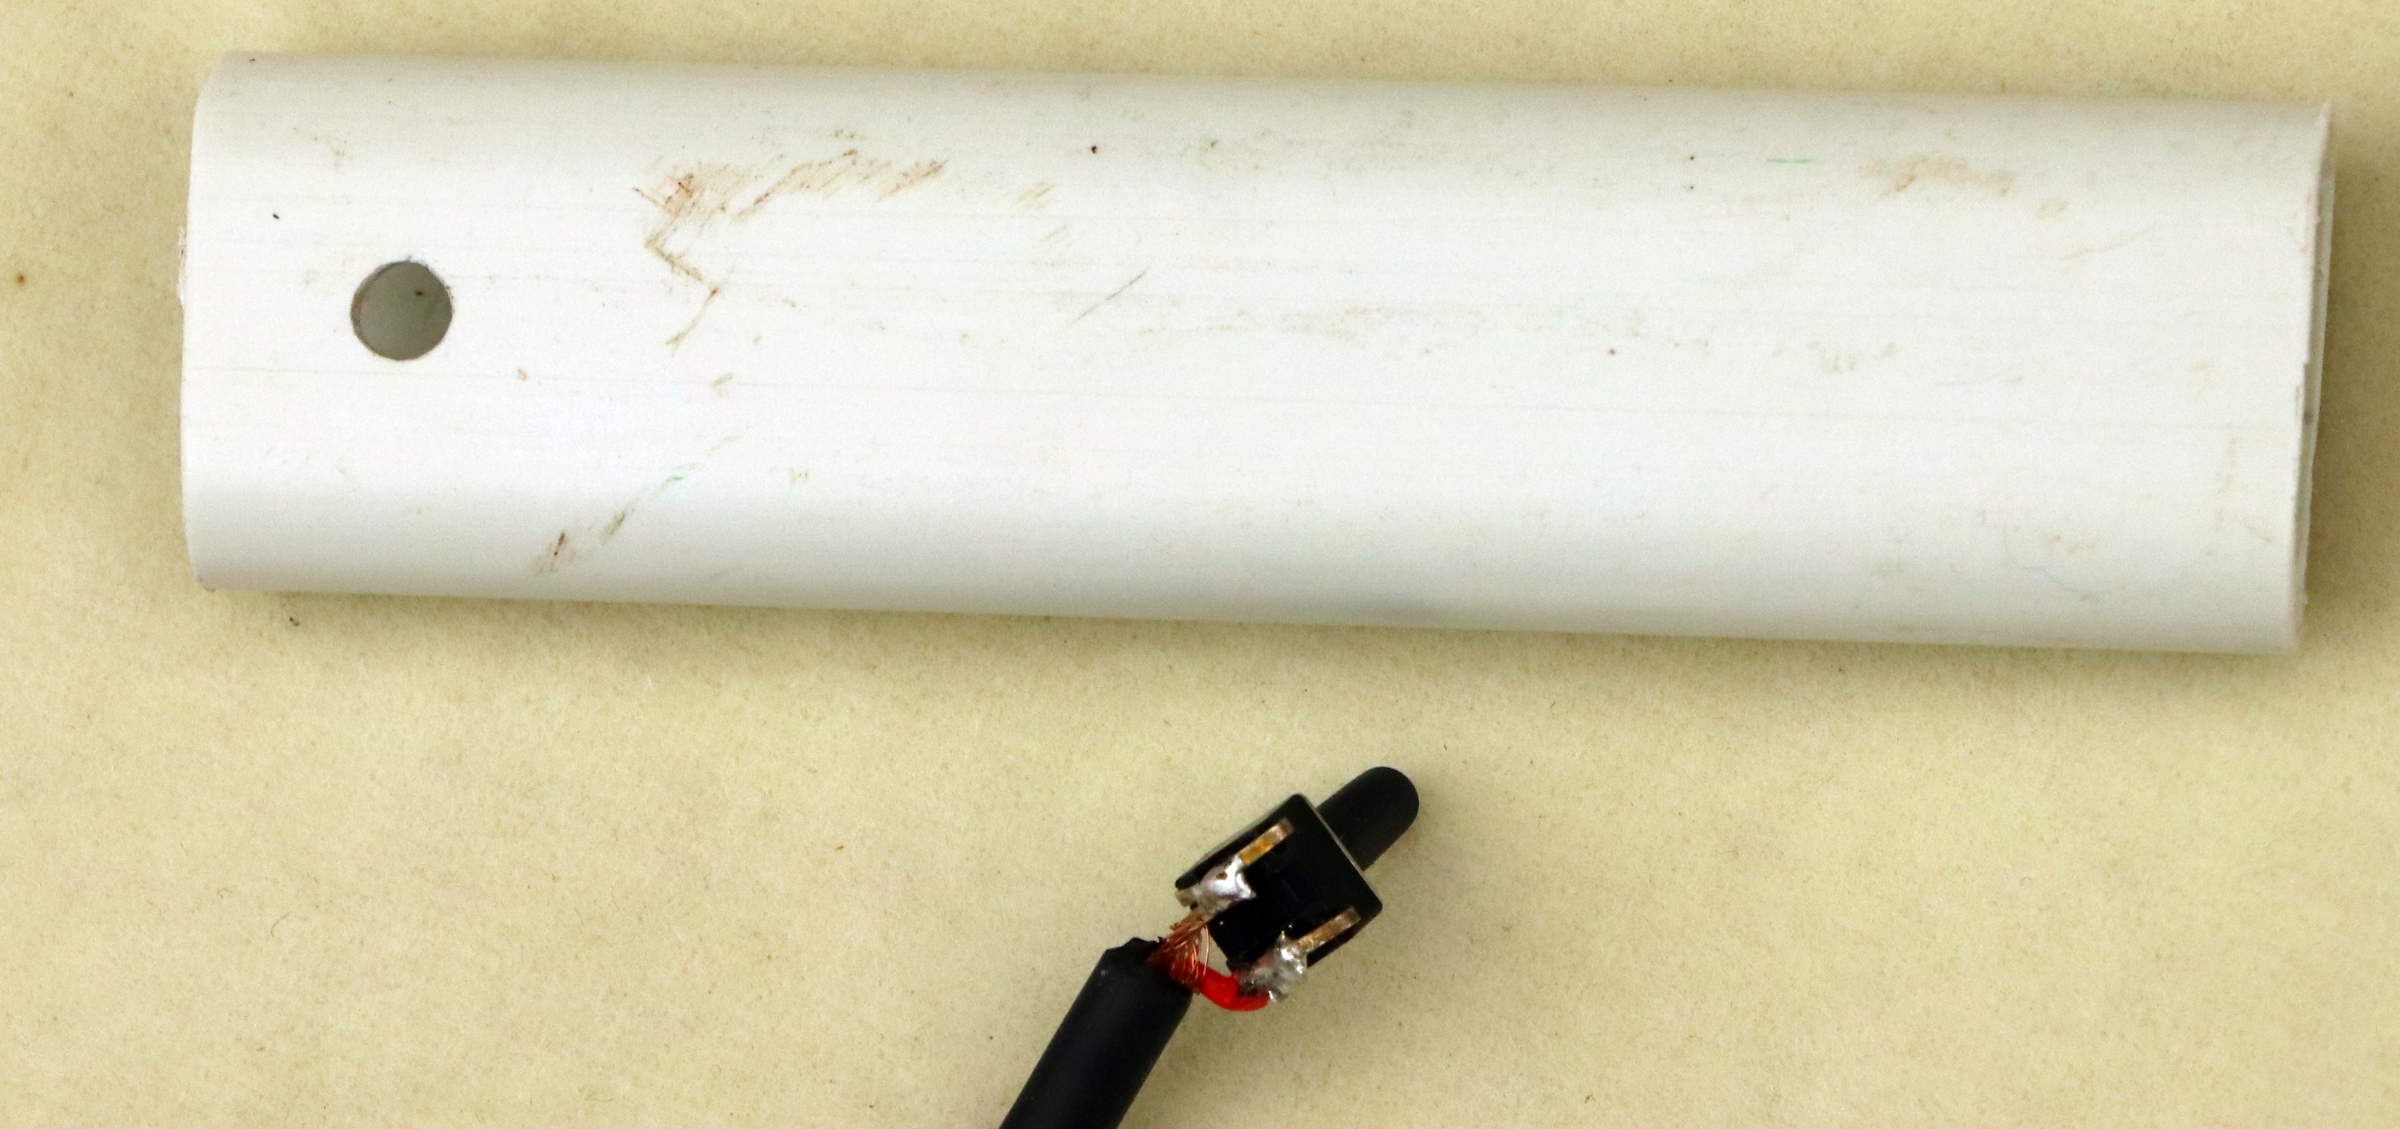
Parts you need. The white plastic tube is oval conduit, often used for embedding in walls for house wiring, but it could be anything similar to hand.
The button length on the switch need to be long enough for it to come through the tube.
Some of the plugs I have have the tabs as shown here, some don’t. If yours has tabs, they just need cutting off.

Drill a 4mm hole in one side of the tube.
Bend the common terminals of the switch flat towards each other and solder the cable.
Put a short length of heat shrink over the cable as strain relief.
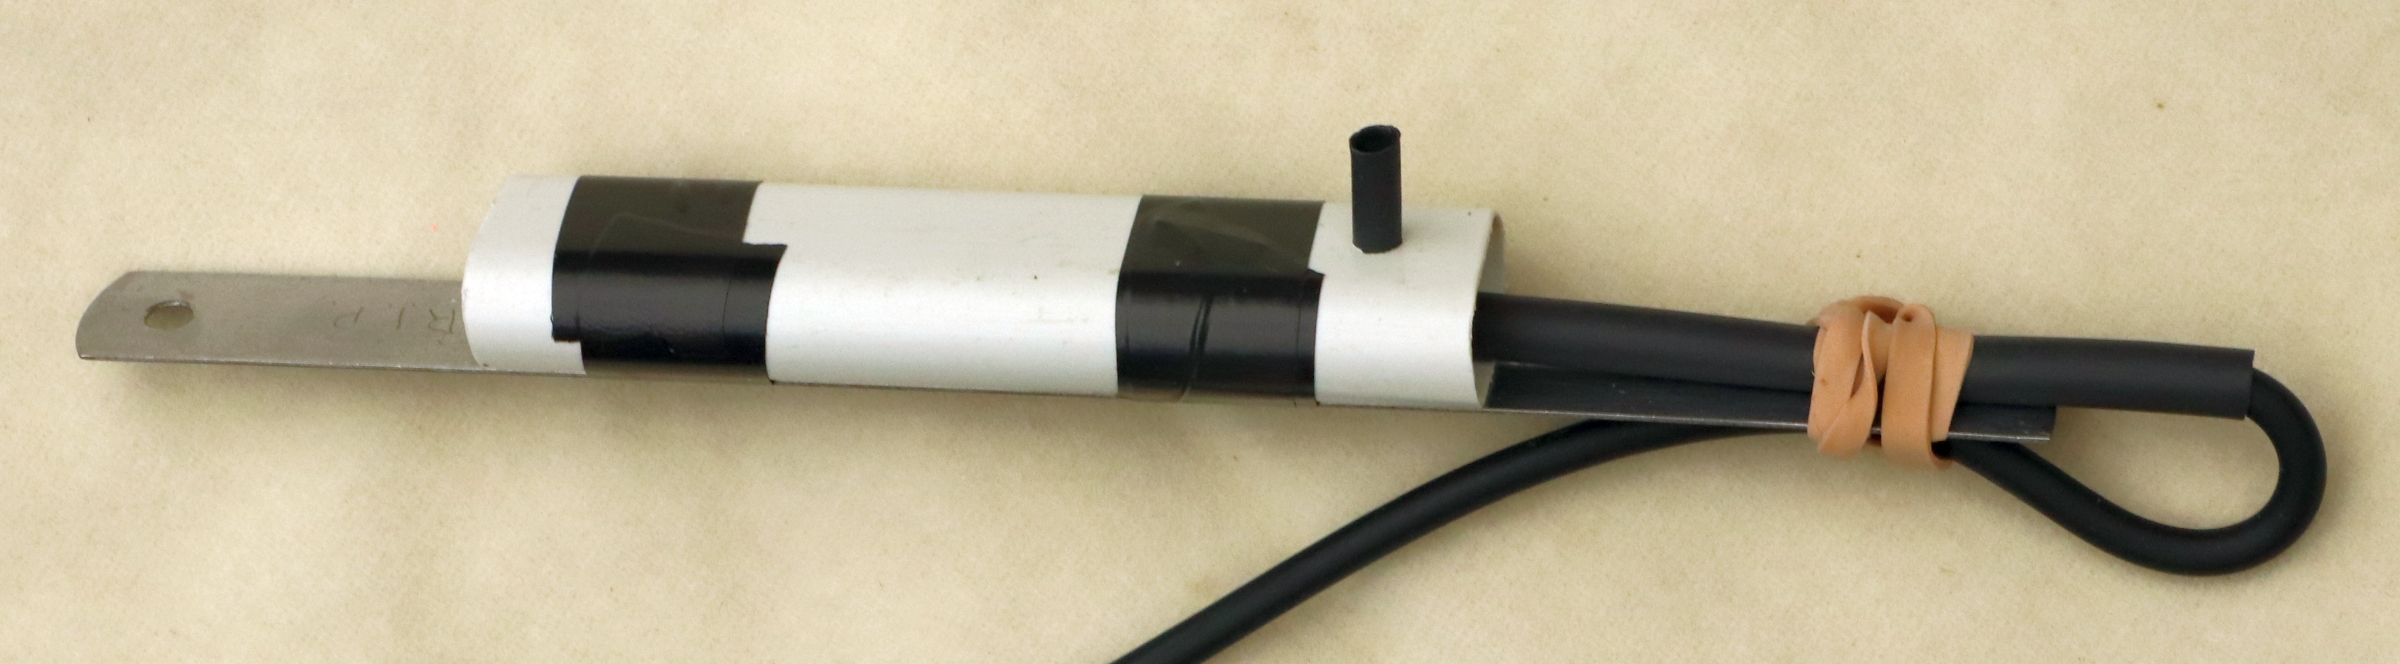
Tape the plastic tube onto a ruler or other suitable item, then work the switch button through the hole in the tube, make it roughly straight, then secure the cable to the ruler with a rubber band. This will allow you to make the switch properly straight, at the same time hod it in place for glueing.
Place a short piece of heat shrink (or rolled paper) over the switch and through the hole. This will certre the switch in the hole, and help to prevent glue getting on the switch shaft..
Using a hot glue gun (or could be epoxy) lift the switch up and place glue under it, press it down into the glue, then add more glue to the sides of the switch. Close the end of the white tube with glue, without getting glue on the top of the switch.
Remove the heat shrink or paper from the switch shaft, and cut the switch so that it extends roughly 1.5mm above the white tube.
Place the larger heat shrink over the finished switch, trim the ends and fill with hot glue.
On the plug end, once the wires and resistor are mounted, put some hot glue over the resistor and the wires where they come out of the plug, but don’t let the glue go more tak 1mm into the plug body, the pins have to be able to move a bit.
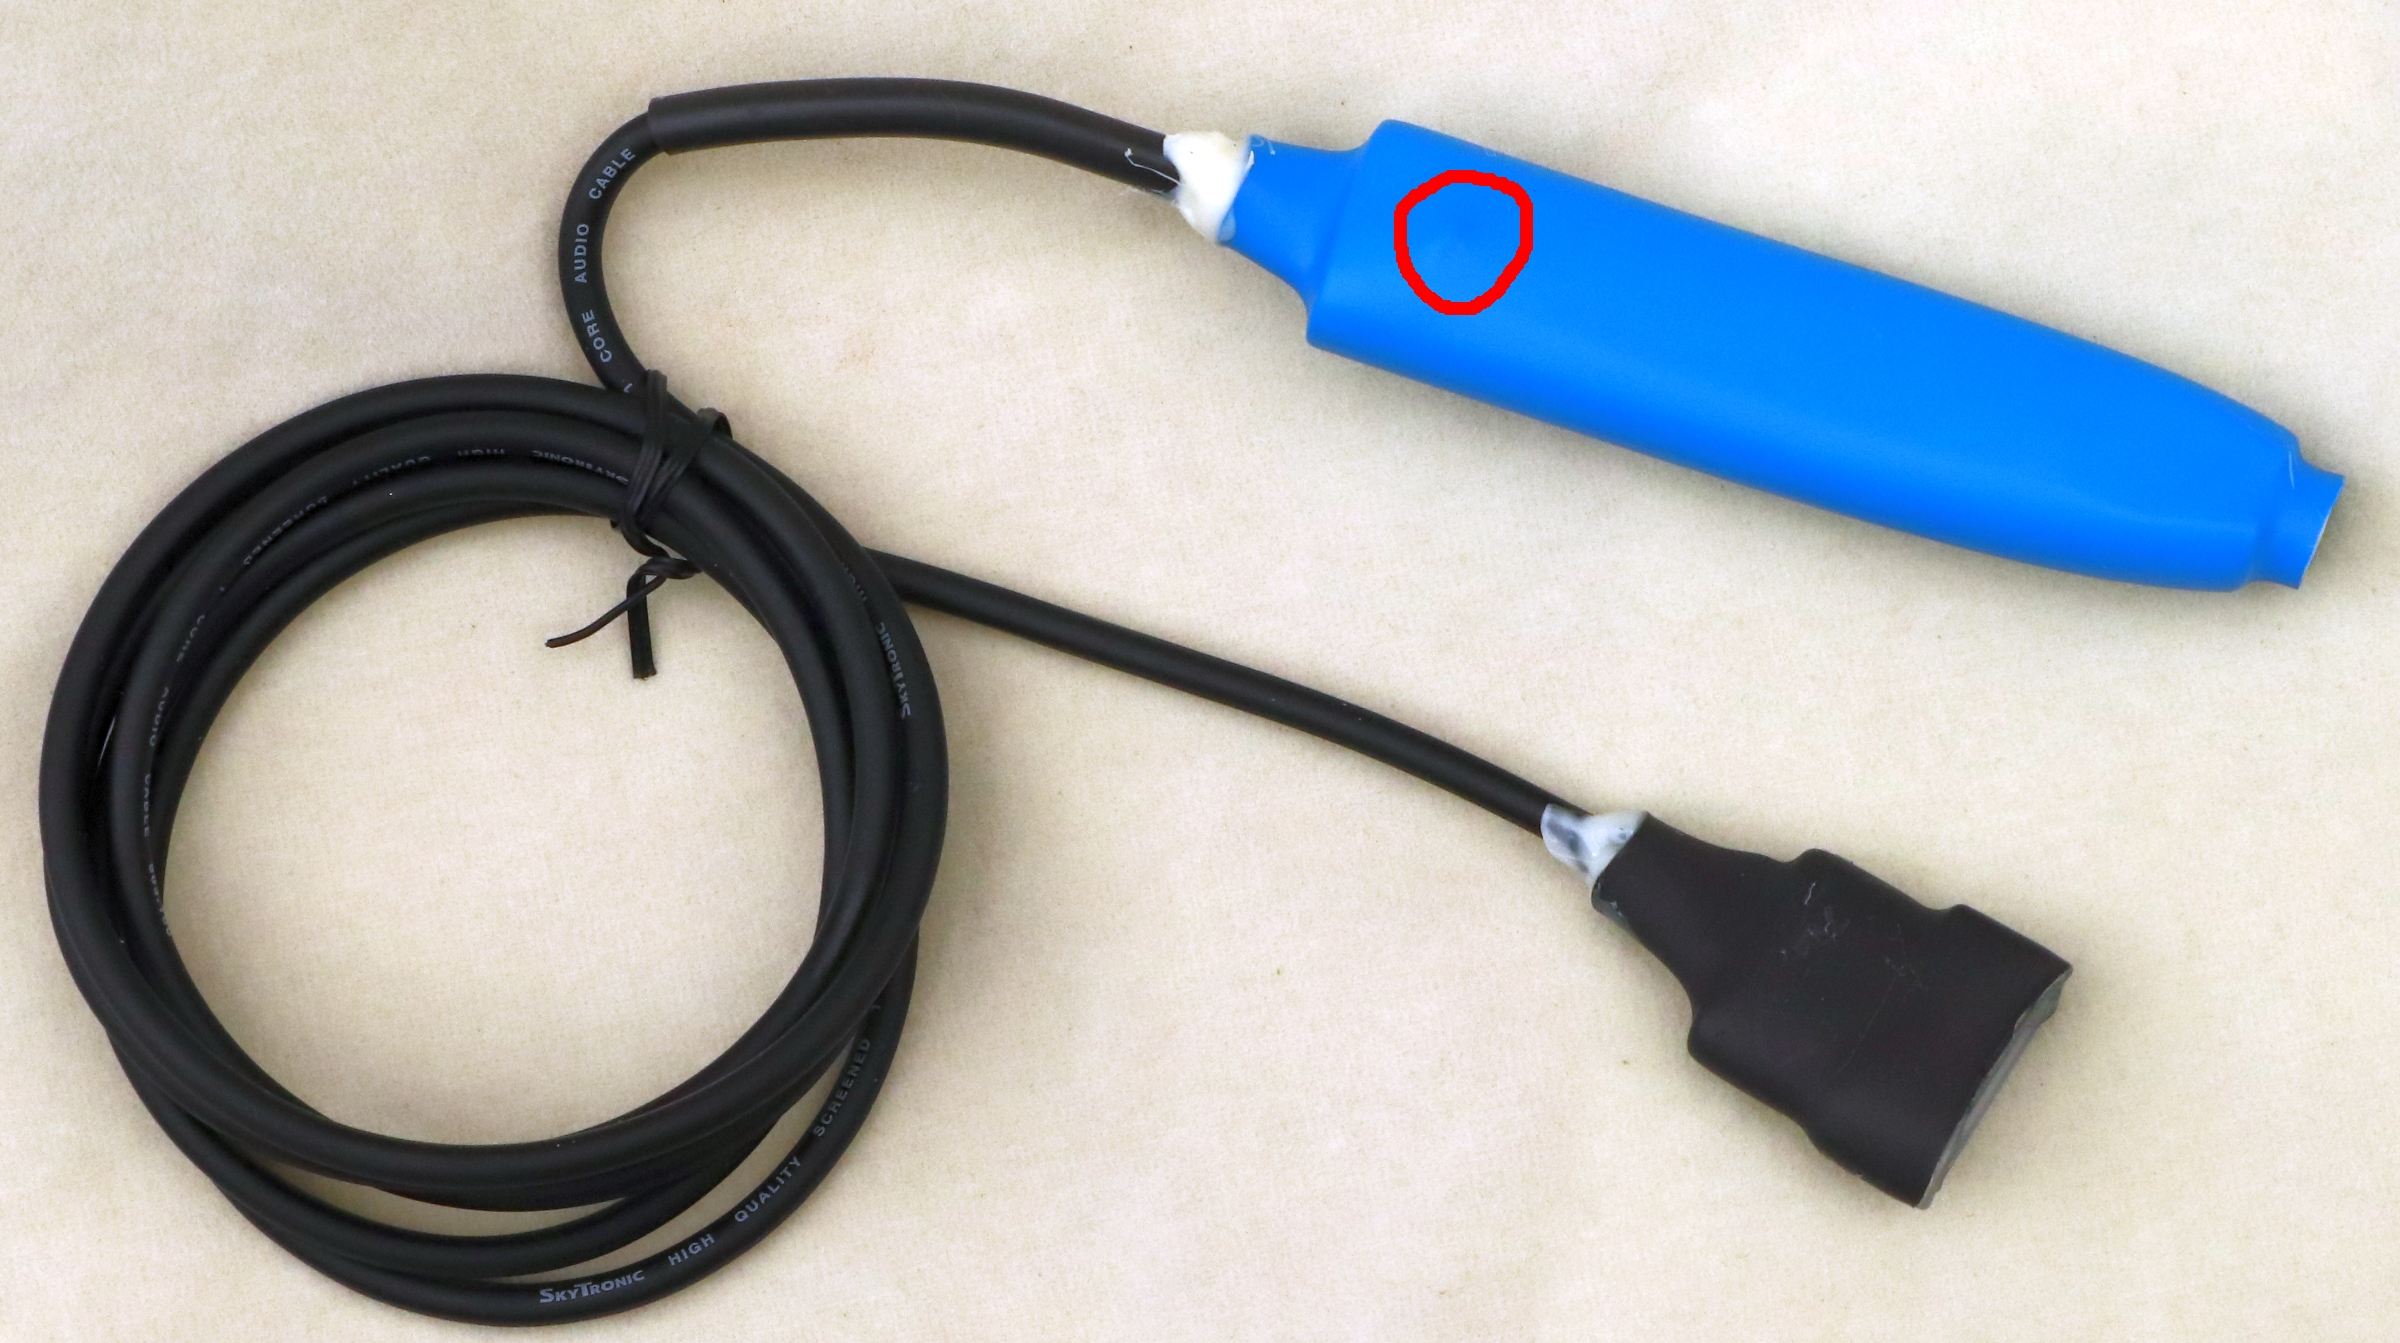
To neaten it up and make it more robust, I place some adhesive lined heat shrink over the plug, then fill the back with hot glue to secure the wire. The heatshrink gives something to pull on when removing it from the radio.
In the photo, you can just see the position of the button where it raises the heat shrink.
Works nicely through the heatshrink, at the same time not do likely to be pressed by mistake.